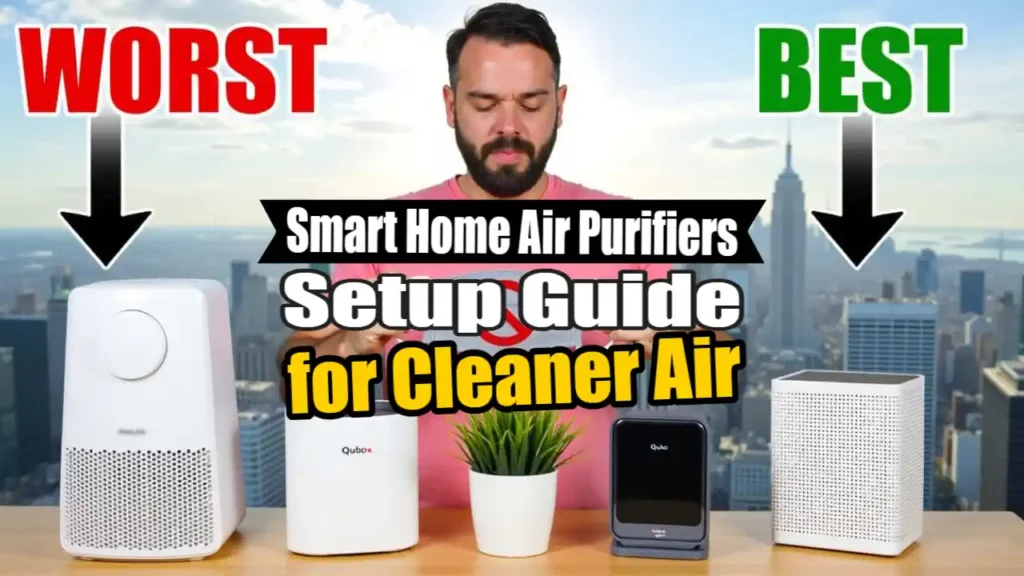
Smart home air purifiers connect to Wi-Fi, allowing app and voice control (Alexa, Google Home, Apple HomeKit) for remote monitoring, scheduling, and automatic adjustments based on real-time air quality sensors that detect dust, pollen, pet dander, and odours.
Key Takeaways – Smart Home Air Purifiers: Setup Guide
- Smart air purifiers provide a number of benefits over traditional models, including air quality monitoring, remote control, and automation, resulting in cleaner air with less effort.
- Placement is key – placing your purifier in high-traffic areas with enough space will maximize its effectiveness.
- Setting up most smart purifiers is a simple 4-step process: physical setup, Wi-Fi connection, app download, and smart home integration.
- Setting custom schedules and automations based on air quality readings allows your purifier to work more efficiently and save energy.
- Regular maintenance, including filter changes and sensor cleaning, is necessary for optimal performance and can be easily managed with smartphone notifications.
Indoor air can be up to five times more polluted than outdoor air, making a good air purification system a necessity in today's homes. Smart air purifiers add a level of intelligence to this important health function, offering automation, data insights, and easy integration with your existing smart home setup. Whether you're worried about allergies, pet dander, cooking smells, or just want cleaner air, a well-configured smart air purifier can revolutionise your home environment.
This step-by-step guide will take you from the moment you take your air purifier out of the box to the point where you have it running at its best. By setting it up correctly and making smart choices in how you use it, you'll not only breathe cleaner air, but you'll also have a more comfortable home with very little work to keep it that way.

Take a Deep Breath: The Benefits of Smart Air Purifiers
While traditional air purifiers require manual operation and provide little feedback about air quality or filter status, smart air purifiers offer a host of advanced features for cleaner air. These devices use advanced sensors to continuously monitor your home's air quality, automatically adjusting their fan speed to address changing conditions such as cooking smoke or increased allergens.
Plus, with remote control capabilities, you can control your smart air purifier from anywhere. Detailed mobile apps also provide unprecedented visibility into your home's air, tracking pollutant levels over time and allowing you to identify patterns. This data helps you make informed decisions about your indoor environment, leading to cleaner, healthier air.
Smart purifiers shine when it comes to their ability to integrate with other devices. By connecting your air purifier to your smart home setup, you can automate actions such as increasing filtration when you start cooking or when the pollen count is high.
Many smart purifiers are compatible with Alexa, Google Assistant, and Siri, so you can control them with your voice. Instead of guessing when you need to change the filter like you would with a traditional air purifier, smart purifiers will send you a notification.

“air purifier – Wikidata” from www.wikidata.org and used with no modifications.
Check Current PricesGetting Started with Smart Air Purifiers: What You Should Know
Before you begin setting up, it’s important to understand how smart air purifiers function to get the most out of them. Essentially, these devices merge the traditional air filtration technology with connectivity features and smart sensors.
The majority of high-quality smart purifiers have multi-stage filtration systems that can handle a variety of pollutants—from tiny allergens to gaseous chemicals and smells.
What Makes Smart Air Purifiers Different From Conventional Ones
Smart and traditional air purifiers are fundamentally different in terms of their connectivity and automation features. Conventional models usually come with basic manual controls such as power, fan speed, and sometimes a timer. In contrast, smart purifiers can connect to your home's Wi-Fi network, which allows you to control them remotely through smartphone apps and integrate them with voice assistants like Alexa or Google Assistant.
Another feature that sets smart purifiers apart is real-time monitoring. They are equipped with sensors that constantly check for particulate matter, volatile organic compounds (VOCs), humidity, and sometimes even carbon dioxide levels in your home.
This information is processed by algorithms that automatically tweak filtration levels to keep air quality at its best without you having to do anything. Many models have color-coded LED indicators on the device itself to show air quality, and they provide a more detailed analysis through their companion apps.
What makes smart purifiers unique for everyday use is their capacity to establish schedules and automation routines. You can set your purifier to operate at faster speeds during cooking times or when pollen counts are usually high, then automatically change to silent mode during sleeping hours.
Some high-end models even employ geofencing to sense when you're on your way home and clean the air in advance of your arrival.
Important Features to Consider
Not every smart air purifier is created equal, so it's important to know which features are most beneficial to you. One of the most critical is the ability to monitor air quality. Look for models that measure PM2.5 (fine particulate matter), VOCs, and other pollutants with dedicated sensors rather than estimating air quality based on how long the unit has been running. Another useful feature is an auto mode, which allows the purifier to adjust its cleaning power based on the level of pollutants it detects, striking a balance between energy efficiency and air quality.
Indicators that tell you when to replace your filters are crucial to keep your air purifier working at its best. The top models will track this based on the percentage of the filter used, rather than just reminding you based on time.
If you want your air purifier to work well with the rest of your smart home, make sure it's compatible with the major smart home platforms like Apple HomeKit, Google Home, and Amazon Alexa. Some of the more advanced models even let you schedule more than just a timer. You can set up daily and weekly programs that match your routine.
Being able to track energy consumption is a great way to understand how much it will cost to run the purifier. Also, quiet operation modes are a must-have for bedrooms and living spaces. Try to find purifiers that keep the noise level reasonable (below 50 dB) even when they are running on higher settings.
A lot of the newer models also have app features that let you see historical air quality data. This is a good way to see how the air quality has improved over time and to identify any patterns of pollution in your home.
- Real-time air quality monitoring with multiple pollutant detection
- Automatic mode with smart adjustment of fan speed
- Detailed filter life tracking and replacement reminders
- Voice assistant compatibility (Alexa, Google Assistant, Siri)
- Scheduling and automation capabilities
- Sleep mode with ultra-quiet operation and dimmed lights
- Historical air quality data and trend analysis
Understanding HEPA, Carbon, and Other Filtration Technologies
The intelligence of a smart air purifier is only as effective as its filtration system. True HEPA (High-Efficiency Particulate Air) filters remain the gold standard, capturing 99.97% of particles as small as 0.3 microns—including dust, pollen, pet dander, and most bacteria.
This filtration level is particularly important for allergy and asthma sufferers. Activated carbon filters work alongside HEPA to absorb gases, VOCs, and odours that HEPA filters can't catch. The quality and quantity of carbon used significantly affect performance, with premium models containing several pounds of specialised carbon.
“Smart air purifiers blend the tried-and-true efficiency of HEPA filters with the ability to monitor and automate, making them truly reactive clean air systems for contemporary homes.”
Where Should You Place Your Air Purifier?
Where you place your smart air purifier can greatly affect how well it works. You need to think about things like how air moves around your home, where pollution is coming from, and where you can easily plug it in and connect it to your Wi-Fi.
Even though smart purifiers have some extra features like being able to control them remotely, you still need to think about where you put them just like you would with a regular purifier. And of course, you need to make sure it can connect to your Wi-Fi wherever you put it.
Put your purifier where it will be the most useful. This is usually in the room where your family spends the most time. The living room or family room are often good choices because they usually have good air flow and are central locations.
If you only have one unit, put it in the room where you spend the most time awake. This will help you get the most out of your investment.
Where to Place Your Purifier in Each Room
When deciding where to place your air purifier, it's important to consider the unique layout of each room. For example, in bedrooms, you should place the purifier at least 3 feet away from the bed. It's also a good idea to put it on the opposite side of the room from the door, so it can capture any pollutants that come in.
However, you should avoid putting it right next to walls or behind furniture, as this could block the airflow. In living rooms, it's best to place the purifier in the middle of the room, away from TVs and other electronics. This allows for the best circulation and lets the sensors accurately monitor the air quality in the room.
One of the best places for an air purifier is the kitchen, but it needs to be placed properly. To avoid the purifier being exposed to grease or too much moisture, it should be placed away from the direct steam and heat of cooking. Ideally, it should be on a counter on the opposite side of where you cook or in the dining room next to the kitchen.
This allows it to capture pollutants from cooking. If you have a home office, place the purifier near your workspace, but not directly behind your computer equipment, because the heat exhaust could affect the sensor readings.
If you have rooms in your home where pollution is a concern, such as pet areas or hobby rooms where chemicals may be used, place the purifier between the source of the pollution and the rest of your living space.
This will create a barrier of filtration that will prevent contaminants from spreading throughout your home. Many people find that raising purifiers on sturdy furniture about 3-5 feet off the ground allows for better air circulation and improves performance.
How Much Space Does Your Smart Air Purifier Need?
For your smart air purifier to work its best, it needs room to breathe. Most companies suggest keeping at least a foot of open space around the sides where the air gets sucked in, and 3 to 5 feet of free space in front of where the air comes out. This keeps the purifier from just recycling air it’s already cleaned, and makes sure it can pull in dirty air from all over the room.
Be sure to check your user manual, because some models pull in air from different sides or even the bottom, and might need a different setup. If you're interested in creating an ideal environment for your smart devices, consider these essential tips for rain-proofing your space.
Despite what manufacturers might suggest, our experience has shown us that corners are not the best place for air purifiers, even though they might be the most convenient. Putting a purifier in a corner restricts the airflow to a 90-degree arc rather than the full 360-degree arc that most purifiers are capable of.
In the same vein, don’t put purifiers directly under shelves or inside cabinets, as this will severely limit their ability to circulate clean air around the room.
Using More Than One Air Purifier in Bigger Homes
If your home is over 1,500 square feet, one air purifier, even if it's a strong one, might not be enough to clean all the air in your house. A better approach is to use several air purifiers throughout your house. This is often more effective than buying one big air purifier.
Start by putting air purifiers in the rooms where you spend most of your time. This is usually the bedrooms and the main living room. This way, you're making sure the air is clean in the most important rooms, even if you can't afford to have air purifiers in every room right away.
Think about the different requirements of each room and the abilities of each purifier if you're using more than one. Put the higher-capacity ones with more advanced filtration in rooms that are more likely to have air quality problems, such as kitchens or pet rooms, and use the simpler ones in bedrooms or offices.
The great thing about smart purifiers is that their apps let you keep an eye on air quality in different rooms, so you can see where the problems are and change your purification plan to match.
For homes with an open floor plan, arrange your air purifiers in a way that allows clean air to flow freely throughout the space, instead of being confined to one area. This could mean placing one unit at one end of a large room and another at the opposite end, or using one near the kitchen and another near the living room.
The best part about smart air purifiers is that they can work together. The most advanced models can even share air quality data with each other.
Steering Clear of Usual Positioning Errors
No matter how high-tech your smart air purifier is, it won't work as well as it could if you put it in the wrong place. Don't put your purifier right next to walls or furniture because it will block the airflow and make the purifier work harder to clean less air.
Also, don't put purifiers in drafty areas near windows or HVAC vents because the strong air currents will mess up the normal patterns of air going into and out of the device.
Smart purifiers can be affected by electronic interference, which can mess with both the sensors and the connectivity. To avoid this, make sure to keep your purifier at least 5 feet away from things like microwaves, wireless routers, or cordless phones that could cause interference.
This will help your purifier to work properly. But also make sure that it's close enough to your Wi-Fi router to get a good signal, because it needs that for its smart features to work.
One of the biggest mistakes people make is to hide air purifiers behind furniture to maintain the aesthetics of the room. While most of the modern smart air purifiers are designed to be aesthetically pleasing, the focus should be on their effectiveness and not on how invisible they are.
If you are concerned about the appearance, you can consider models that are designed to blend with the home décor instead of compromising on their performance by placing them inappropriately. For more ideas, check out these design essential tips.

Easy Setup for Beginners
Smart air purifiers are some of the easiest smart home devices to set up, usually involving just four steps: physical setup, connecting to Wi-Fi, installing the app, and integrating with your smart home system. AirSmart has one of the best setup experiences, offering guided tutorials that take you through each step and help you troubleshoot any potential issues before they become a problem.
Before you start setting up, make sure you have a good Wi-Fi connection in the room where you plan to keep your air purifier. You should also have your Wi-Fi network name and password ready. Most smart air purifiers can only connect to 2.4GHz Wi-Fi networks, not the newer 5GHz networks, so make sure your router can provide a 2.4GHz network.
To make the setup process go more smoothly, download the manufacturer's app before you even take the air purifier out of the box. Also, make sure the Bluetooth on your smartphone is turned on, because you'll need it for the initial pairing process.
Unpacking and Setting Up
Start by unboxing your purifier in the room where you plan to use it, making sure to remove all packaging materials. Many models come with filters wrapped in plastic or with protective seals that need to be removed before you use it for the first time.
Open the filter compartment carefully, following the manufacturer's instructions, and make sure all filters are in place and any plastic wrapping is completely removed.
One of the most common reasons new purifiers don't work well or show error messages is that the filters aren't installed correctly. For more tips on air purifier setup and maintenance, you can refer to this guide.
Put your air purifier where you want it to be, making sure it has enough space around it as we talked about before, and plug it in. Most purifiers will have a light or screen that shows that it’s starting up. Let it finish starting up before you do anything else. Some fancier models like the ones from AirSmart have a setup app that uses sensors to help you figure out the best place to put it.
For models that come with separate components such as external air quality monitors or remote controls, you should unpack and set these up based on the instructions provided by the manufacturer.
Generally, external sensors should be positioned at the height of your breathing in a central location that is away from direct sources of pollution. This will give you the most accurate readings of the air quality in the room.
Linking Your Purifier to Your Home Wi-Fi
Once you've physically set up your purifier, the next step is to connect it to your home Wi-Fi network. The majority of models will automatically go into pairing mode the first time they're powered up.
You'll know it's in pairing mode if you see a flashing Wi-Fi symbol or a specific color pattern on the control panel. If your purifier doesn't automatically go into pairing mode, check the manual to find out how to manually put it into pairing mode. Usually, this involves holding down the Wi-Fi or power button for 3-5 seconds. For more information on setting up your air purifier, you can refer to this guide to cleaner indoor air.
Go to the Wi-Fi settings on your smartphone and find the temporary network that your purifier has created. It should look something like the brand name and then a serial number. Connect to this network.
This allows your phone to talk directly to the purifier while you're setting it up. If it asks you for a password, check the manual or look for a sticker on the device. A lot of manufacturers print the default passwords on the device or include them on a separate piece of paper.
Check Current PricesInstalling the App and Creating Your Account
After turning on your purifier, the next thing you'll need to do is download the app made by the manufacturer. Go to your device's app store and look for the app that's listed in your purifier's manual.
Most of the big brands, such as Dyson, Philips, Blueair, and AirSmart, have free apps that not only guide you through the setup process but also let you control your purifier.
You'll need to create an account using your email address and a password that's secure, as this account will be used to save your settings and the history of your air quality. For more detailed guidance, you can refer to this guide to cleaner indoor air.
Once you've got the app installed, you'll be prompted to add your purifier. Most apps will automatically find your device if you have Bluetooth enabled on your phone and are within range.
If your purifier doesn't show up automatically, you may need to scan a QR code on the device or manually enter a serial number to identify it. The app will then walk you through connecting your purifier to your home's Wi-Fi network. You'll need to select your network and enter your password.
While you are doing this, make sure your phone is close to the purifier until you see that the connection is confirmed.
Most apps will let you know you have been successful and start to show you data about the air quality once the connection is up and running. If you have trouble getting connected, try moving your purifier closer to your Wi-Fi router while you're setting it up, as some models don't have a very far range for the first time you connect.
Pairing with Voice Assistants
For a more comprehensive experience with your smart air purifier, you can pair it with your favorite voice assistant. In your purifier's app, search for a section that says “Works with” or “Integrations”. This will show you which voice services are compatible with your purifier.
If you want to connect it with Amazon Alexa, click on the Alexa option and follow the steps to connect your purifier account with your Amazon account. The steps are similar for Google Assistant and Apple HomeKit, although HomeKit may require you to scan a special code that comes with HomeKit-certified purifiers.
After you've successfully linked your devices, you can easily control your air purifier with simple voice commands such as “Alexa, turn on the living room purifier” or “Hey Google, set the bedroom purifier to sleep mode.”
There are also more advanced commands that you can use, but these will vary depending on the manufacturer of your device. Some of these might include checking the air quality (“Alexa, what's the air quality in the living room?”) or adjusting the settings (“Hey Google, set the purifier fan speed to 3”). After you've set everything up, it's a good idea to test out some of the basic commands to make sure everything is working properly and to get a feel for what your system is capable of.
Resolving Connection Problems
During the setup of your smart air purifier, you might experience some connection issues. Don't worry, these are usually easy to fix. If your purifier isn't connecting to Wi-Fi, make sure you're trying to connect to a 2.4GHz network. A lot of smart devices can't connect to a 5GHz network.
If your dual-band router uses the same network name for both the 2.4GHz and 5GHz frequencies, you might need to temporarily turn off the 5GHz band in your router's settings during the setup process. Also, make sure your purifier is no more than 15-20 feet away from your router during the initial setup to ensure a strong connection.
If the app doesn't find your air purifier, you can try to reset the Wi-Fi module on your device. Just hold the right button combination (usually the Wi-Fi or power button) for 5-10 seconds until the lights flash in a reset pattern.
Then start the connection process over. If you're still having trouble, make sure your router's firmware is up to date and it's not using weird security settings that might block IoT devices. If all else fails, some people have had luck with turning off their phone's cellular data during setup so it only focuses on the Wi-Fi connection.
Setting Up Your Purifier for Optimal Performance
Once your purifier is connected and working, you can start to adjust the settings to suit your needs. The default “auto” mode is great for general use, but you can get the most out of your purifier by setting up custom settings.
This will help you to get the best performance and energy efficiency from your purifier. One of the great things about modern smart purifiers is that they can operate on their own, and they can adapt to your lifestyle and air quality needs.
Setting Up Automatic Mode
One of the main benefits of smart purifiers over traditional models is the auto mode. This smart setting uses built-in air quality sensors to automatically adjust the fan speed based on the level of pollutants detected.
Go to your purifier's main control screen in the app and look for the “Auto” or “Smart” mode option. Switching on this setting will allow your purifier to increase filtration when there's cooking smoke, pet activity, or outdoor pollution in your home, then reduce speed when the air quality improves to save energy.
Some top-of-the-line models allow you to customise the sensitivity levels for auto mode. If you notice that your purifier often runs at high speeds when it doesn't need to, consider lowering the sensitivity in the settings menu.
On the other hand, if you suffer from allergies or live in a highly polluted area, you might want to increase the sensitivity to ensure the air quality is always top-notch. The most effective auto modes take into account more than just particulate matter, adjusting differently for cooking smells as opposed to dust or pollen.
Setting Up Your Own Timetable
Although auto mode takes care of immediate changes, setting up timetables lets your purifier get used to the regular patterns in your house. In the schedule or timer section of your app, set up a daily timetable that fits your routine.
For instance, set the fan speed higher during cooking hours (usually 5-7 PM), medium speeds during active hours, and quieter operation during sleep hours. Some households find it helpful to schedule more filtration before family members get back home from work or school, making sure they come home to an environment with clean air already.
Higher-end models often include advanced scheduling features, allowing you to set different settings for weekdays and weekends. This is a smart move, considering that most people's home occupation and activities tend to follow a weekly pattern.
This way, you won't be running your purifier at high speeds when no one is home during the week. The most advanced systems, such as AirSmart, can even learn from your manual adjustments over time, gradually adapting their automatic schedule to better match your preferences and patterns.
Bedroom Settings for Sleep Mode
Sleep mode is a feature that combines efficient air filtration with reduced noise and dimmed lights to create a comfortable sleeping environment. You can find this feature in the mode selector or sleep section of your app.
The best way to use this feature is to schedule it to turn on at your usual bedtime and turn off when you usually wake up. Many purifiers allow you to customise the settings for sleep mode, such as the maximum fan speed during sleep hours or whether to completely dim the display lights or keep minimal indicators.
If you're the type of person who can't sleep with any light in the room, you should look for a purifier that allows you to turn off all lights while it's running. If your purifier doesn't have this feature, you could use small pieces of tape to cover any lights that won't turn off.
Everyone has a different tolerance for noise, so you'll need to play around with the fan speed settings to find a balance between a quiet machine and one that cleans your air effectively. This is especially important while you're sleeping because this is when your body is trying to recover from being exposed to pollutants all day.
Optimizing Settings with Air Quality Data
Smart purifiers are equipped with the ability to gather and showcase air quality data over time. This is one of their most useful features. Most apps that accompany these devices have a history section. This displays pollution patterns over the course of the day and week. After using the purifier for a few weeks, look over this data.
This will help you pinpoint when pollution is at its highest in your home. These times often align with cooking, cleaning, or when outdoor pollution is high. You can then use this information to fine-tune your schedules and automation rules. This will allow you to concentrate more filtration power during the times when pollution in your home is predictably at its highest.
Keep an eye on the air quality trends during the night. If your bedroom air quality remains good throughout the night, you may be able to lower the filtration speed to reduce noise without compromising comfort.
On the other hand, if the data shows that air quality decreases at certain times, you may need to increase the minimum fan speeds during sleep mode. Some advanced systems can export this data or integrate it with health apps, allowing you to see how improvements in air quality correlate with changes in sleep quality or allergy symptoms.
Linking to Your Smart Home System
Although operating independently through a maker's app is effective, incorporating your air purifier into your wider smart home system opens up impressive automation options.
This integration enables your purifier to work together with other devices, reacting to environmental shifts and your presence automatically without needing manual changes through individual apps.
Check Current PricesCompatibility with Different Platforms (Apple HomeKit, Google Home, Amazon Alexa)
Most of the high-end smart purifiers on the market are compatible with at least one major smart home platform, with many of them being compatible with all three of the main ecosystems. Apple HomeKit integration comes with robust privacy controls and local processing, making it the perfect choice for users who are more concerned about security.
To add your purifier to HomeKit, you will typically need to scan a code on the device or in its manual using the Apple Home app. Google Home offers excellent voice control options and is integrated with Nest products, while Amazon Alexa is compatible with the widest range of devices for complex automation scenarios.
Whether or not a smart air purifier is compatible with your existing smart home platform can depend on the brand and even the specific model. Brands like Blueair and Dyson usually support a wide range of platforms, but cheaper brands may only work with one.
You should also think about how deeply the purifier integrates with your platform. Some purifiers only let you turn them on or off with your voice assistant, while others let you control the fan speed, choose a mode, and even report on air quality.
Automating Your Smart Purifier
Setting up automation routines can make your smart purifier even more convenient and effective. You can do this in your favorite smart home platform app. Set up routines that will trigger your purifier based on other events or conditions.
For example, you can set your purifier to automatically go to high speed when your smart kitchen devices indicate that you're cooking. Then, it can return to normal mode an hour after you finish cooking. You can also set up a “Leaving Home” routine that puts your purifier in eco mode when everyone leaves. And you can set up a “Returning Home” routine that starts cleaning the air a little before you're expected to get home.
If you have smart air quality monitors in several rooms of your house, you can set up conditional automations that turn on certain air purifiers when the monitors detect a high level of pollutants in specific areas. If you're a more advanced user, you can set up more complicated automations.
For example, you could have the exhaust fans in your bathrooms and the air purifiers near them turn on when the humidity sensors detect that someone is taking a shower. Or, you could have extra filtration kick in when the pollen count reported by the weather service goes above a certain level.
Connecting with Other Smart Devices
The real power of smart purifiers comes out when they're used together with other devices. You can connect your purifier with smart thermostats to manage air cleaning with heating and cooling cycles, making sure the air is moving around while the filters are working.
You can also connect with smart vacuum robots to filter the air more during and after vacuuming, catching any dust that gets kicked up into the air while cleaning. Some systems can even connect with smart window sensors, so they filter the air more when the windows are open to deal with any outdoor pollution that comes in.
If you suffer from allergies, you might want to think about setting up automation routines for different seasons. These can coordinate your air purifiers with humidifiers and dehumidifiers to keep conditions just right.
A lot of people find it helpful to connect their bedroom purifier to their sleep tracking devices. This lets the purifier adjust its filtration based on whether you're in a deep or light phase of sleep. The more smart devices you add to your home, the more possibilities you have. You can create an environment that anticipates what you need instead of just responding to your commands.
Keeping Your Smart Air Purifier in Top Shape
Even the most cutting-edge smart air purifier needs regular care to work at its best. Traditional models often go without maintenance until an issue comes up, but smart purifiers give you reminders and step-by-step instructions through their apps.
By keeping up with regular maintenance, you can make sure your air stays clean and your purifier lasts as long as possible. For more on maintaining home features, check out these essential tips for rain-proofing your treehouse design.
When to Replace Your Filter
Changing the filter is the most important maintenance task for any air purifier. Most smart models track filter life based on how much you actually use the device rather than just the passage of time, so you get a more accurate idea of when to replace the filter.
You can find this information in the device status or maintenance section of your app, which usually shows the remaining life as a percentage or the estimated number of days until you need to replace the filter.
As a rule of thumb, you should plan to replace HEPA filters every 6-12 months depending on how much you use the device and the air quality in your home, while activated carbon filters may need to be replaced more often in homes with cooking smells or chemical issues.
When it's time to order new filters, make sure to stick with the ones recommended by the manufacturer and designed for your specific model. Generic or “compatible” filters may not filter the air as effectively, or they may not fit properly, which could allow air to bypass the filter.
Many apps make it easy to order filters by offering direct ordering, so you know you're getting the right parts. Some high-end brands like AirSmart even offer subscription services that will automatically send you new filters right when you need them, based on how much you've been using your air purifier.
How to Clean the External Sensors
Smart purifiers depend on different sensors to keep track of air quality and modify their operation as needed. As dust gathers on their surfaces over time, these sensors can become less precise. Every 1-2 months, lightly clean the sensor openings with compressed air or a soft brush attachment on a vacuum cleaner.
For a more in-depth cleaning, some manufacturers suggest using a dry cotton swab to delicately remove buildup from sensor apertures—never use liquids unless the manufacturer specifically instructs you to, as moisture can harm sensitive electronic components.
Focus on cleaning the air intake grills and pre-filters that safeguard your primary filtration system. These places gather visible dust and hair that can limit airflow if permitted to build up.
Most purifiers enable easy removal of external grills for cleaning with a damp cloth, while washable pre-filters should be rinsed following manufacturer instructions (typically every 2-4 weeks in dusty conditions).
Alerts for Cleaning and Upkeep
Smart purifiers are great at letting you know when they need a little TLC. To get these alerts, you'll need to turn on push notifications in your purifier's app settings. These alerts will tell you when it's time to replace the filter, clean the machine, or if there are any performance issues.
This way, you don't have to guess when it's time for a little maintenance, and your purifier will keep working at its best without you having to constantly check on it.
How to Tell If Your Air Is Cleaner
One of the best things about smart purifiers is that they can show you how well they're working. They do this by measuring the air quality in your home. Once you understand what these measurements mean, you can use them to decide where to put your purifier and what settings to use.
Most people notice that their home smells better and they have fewer allergy symptoms after they start using a smart purifier. But the measurements can show you that your air really is cleaner, so you can be sure that your purifier is worth the money.
Progress can be seen both through the purifier's own reporting and through noticeable improvements in comfort and health. Many users report reduced dust accumulation on surfaces throughout their homes after several weeks of consistent purifier operation.
Others notice improvements in sleep quality, reduced morning congestion, and fewer allergy symptoms—all indicators that your air quality is indeed improving even beyond what sensors can measure.
Interpreting Air Quality Measurements
Many smart purifier apps use a variety of metrics and indicators to display air quality. Among the most common are particulate matter (PM) readings, especially PM2.5 (particles smaller than 2.5 microns) as these can deeply penetrate the lungs.
Generally, good air quality is indicated by PM2.5 levels below 12 μg/m³, with higher readings indicating progressively worse air quality. To make these readings easier to understand, many apps use color-coded indicators—green for good, yellow for moderate, and orange or red for poor—so you can quickly assess air quality.
- PM2.5: Fine particles smaller than 2.5 microns (dust, smoke, allergens)
- PM10: Larger particles up to 10 microns (pollen, mold spores)
- VOCs: Volatile organic compounds from cleaning products, paint, furniture
- AQI: Air Quality Index, a composite score based on multiple pollutants
- Humidity: Moisture level that affects comfort and mold potential
Beyond numerical readings, pay attention to trends in your air quality data. Most smart purifier apps include historical graphs showing how air quality changes throughout the day and week.
These trends often reveal patterns related to your activities—spikes during cooking or cleaning, for instance—and demonstrate how effectively your purifier addresses these temporary pollution events. Look for faster recovery times (how quickly air quality returns to good levels after a pollution event) as an indicator of your purifier's effectiveness.
At first, you'll likely see a significant improvement in air quality, especially if you've never had an air purifier before. PM2.5 levels may drop from 30+ μg/m³ to single digits within hours of installing your air purifier. For more information on how to effectively use your air purifier, check out this guide on air purifier placement and maintenance.
After this initial drop, don't expect the air quality to keep getting dramatically better. Instead, aim for consistently good readings. If the readings are consistently in the “good” range (usually indicated by green on app indicators), that means your air purifier is doing its job and maintaining healthy air.
Remember that your purifier can only do so much. Seasonal changes and outdoor pollution events can still affect indoor readings.
During wildfire season, pollen peaks, or periods of high outdoor pollution, your purifier may have to work harder to maintain good air quality. These challenging periods are often when purifiers prove their worth.
Employing Third-Party Air Quality Monitors
If you want to be certain that your purifier is doing its job, you might want to think about using an air quality monitor from a different manufacturer. These independent devices can provide a second opinion on the improvements your purifier's built-in sensors are reporting.
To get an accurate reading of the air you're actually breathing, place the independent monitor at breathing height in the centre of your room, away from direct airflow from the purifier, rather than what's directly in front of the purifier's output.

What Health Benefits Can You Expect?
While everyone's experience is different, most people see noticeable health benefits within 2-4 weeks of consistently using a smart air purifier that's been properly set up. People with allergies often report fewer symptoms, including less sneezing, less congestion, and less irritation in their eyes.
Those with asthma or other respiratory sensitivities may have fewer attacks or less severe attacks when triggers like dust or pet dander are effectively removed from the air.
Many people also report better sleep quality and waking up with clearer breathing, likely because they're not exposed to as many irritants that can cause subtle inflammation in their breathing passages while they're sleeping.
Take Charge of Your Indoor Environment for Fresh Air Everywhere
Once you've set up your smart air purifier, you're well on your way to a healthier indoor lifestyle. As you get to know your system and establish routines that make the most of its capabilities, you'll have an unparalleled level of control over the air quality in your home.
By combining automated operation, adjustments that respond to changes in conditions, and detailed air quality data, you can actively manage and improve an aspect of your environment that used to be invisible. With the right setup, strategic placement, and regular maintenance, your smart air purifier will keep providing cleaner, healthier air for many years—silently contributing to your overall wellbeing in ways that you'll notice every day.
If you want to get the most out of your indoor air quality experience, AirSmart's integrated ecosystem of purifiers and sensors provides a complete solution that adapts to your specific needs and gives you detailed insights into the unique air quality patterns in your home.
Common Questions for this Smart Home Air Purifiers: Setup Guide
Smart air purifiers often lead to a lot of questions about how they work, how well they work, and how to keep them working well. Here are answers to the questions we hear most often from people who are new to smart air purifiers and from people who have been using them for a while.
These tips and tricks will help you get the most out of your smart air purifier and avoid some of the most common mistakes that can make them less effective.
Keep in mind that while these are general answers for most high-quality smart purifiers, always refer to the manual of your specific model. The manufacturer may have different recommendations based on their unique technology or design features.
When should I change the filters in my smart air purifier?
The frequency of filter changes depends on the model of your purifier, the quality of your air, and how often you use the device.
HEPA filters usually need to be replaced every six to twelve months under regular conditions, while activated carbon filters can last between three and eight months, depending on the levels of odour and VOC in your home.
Instead of just using the calendar to determine when to change your filters, you should also use the filter life indicators in the app for your air purifier. These indicators calculate the remaining life of your filter based on how long the purifier has been running and the levels of pollution it has detected. This smart estimate is much more accurate than a fixed schedule.
If you have pets, if someone in your home smokes, or if you cook regularly, you'll need to replace your filters more often than households with fewer sources of pollution. Some of the more advanced purifiers available now adjust their estimates of filter life based on the levels of pollution they detect, providing increasingly accurate predictions as they learn about your environment.
When your app indicates that 20% of filter life remains, order replacement filters to make sure you have them on hand when you need them. Waiting until filters reach 0% significantly reduces the effectiveness of air cleaning and can put a strain on your purifier's motor.

Do smart home air purifiers really help with allergies and asthma?
Yes, smart air purifiers that are correctly sized and positioned, and equipped with true HEPA filtration, can significantly reduce common allergens such as pollen, pet dander, dust mites, and mould spores, which are all known triggers for allergic reactions and asthma symptoms.
Clinical studies have shown that high-efficiency air purifiers can reduce particulate matter by over 90% in controlled environments, and many people with allergies report noticeable symptom reduction within 1-2 weeks of consistent use. The automatic adjustment capabilities of smart purifiers are particularly beneficial for people with allergies, as they can increase filtration during high-pollen seasons or when sensors detect elevated particulate levels.
For the best results in allergy relief, use your smart purifier in conjunction with other allergy-reducing methods such as regularly vacuuming with a HEPA-equipped vacuum, washing your bedding in hot water every week, and keeping the humidity levels in your home between 40-50% to prevent dust mites and mould from growing.
You should concentrate your air purification efforts in the bedrooms where you spend 7-9 hours each night breathing the same air. You might also want to think about setting your purifier to a higher filtration level while you sleep to help your respiratory system recover during these important hours.
How much energy does a smart air purifier use?
Most of the latest smart air purifiers are energy efficient, using between 4-90 watts depending on the fan speed and the size of the model. When running at low or medium speeds (which is where they spend most of their time in auto mode), they usually use between 5-30 watts of power, which is about the same as an LED light bulb.
Even if you leave them running all the time, they will only add about $3-15 to your electricity bill each month, which makes them one of the cheapest ways to continuously improve your health.
Smart features actually help save energy compared to traditional purifiers, as smart auto modes only run at high power when necessary instead of all the time.
Many models also include eco modes that reduce power usage during times of good air quality or scheduled low-usage hours. To operate most efficiently, make sure your purifier is the right size for your space—an undersized unit that is forced to run constantly at high speeds will use more energy than a model that is the right size and can maintain air quality at lower, more efficient fan settings.
Should I keep my air purifier on 24/7?
Yes, for the best air quality, it's recommended that you keep your air purifier running all the time. Indoor air is always being polluted by activities like cooking, cleaning, pets, and outdoor air coming in through doors, windows, and vents.
If you only run your purifier when you can see pollution (like smoke or dust), you'll miss the tiny particles that often have the biggest impact on your health.
Smart purifiers solve the problem of efficiency with continuous operation by automatically switching to lower, energy-saving settings when the air quality is good.
Instead of switching off your air purifier, you might want to consider using its scheduled modes or eco settings when you're not at home if you're worried about energy consumption. These modes use less power but still maintain a basic level of air quality.
One of the best things about smart purifiers is that they can automatically increase their power when they sense that the air quality is getting worse, and then go back to using less power once the air is clean again. This means that you get continuous protection without using too much energy.
Do smart air purifiers eliminate viruses and bacteria from the air?
Many airborne viruses and bacteria can be trapped by high-quality air purifiers with true HEPA filtration, although the effectiveness depends on the specific size of the pathogen and the design of the purifier. True HEPA filters trap 99.97% of particles as small as 0.3 microns, which encompasses many bacteria and some viruses.
However, the smallest viruses, including some respiratory viruses, may be smaller than this threshold. Some high-end models include additional technologies such as UV-C light or photocatalytic oxidation that can deactivate trapped microorganisms, providing an additional layer of protection beyond physical filtration.
Although air purifiers play a crucial role in lessening airborne germs, they should be viewed as one piece of a larger indoor health strategy. Proper air flow, humidity regulation, and routine cleaning are still important habits to have in addition to air purification. For individual health worries about contagious diseases, turn to up-to-date public health advice instead of depending solely on air purification.
Smart purifiers help improve overall lung health by lowering many typical triggers that can weaken immune function, possibly aiding your body's natural defenses against infections. For those interested in maintaining a healthy home environment, understanding the importance of durable materials in household items can also be beneficial.
If you're seeking the most thorough solution to your indoor air quality needs, you might want to check out AirSmart's all-in-one purification systems. These systems use top-tier HEPA filtration and exclusive sensing technology to detect and eliminate specific pollutants in your home's air.
Setting up a smart home air purifier is not as complicated as it may seem. Here's a step-by-step guide on how to do it.
Firstly, you'll need to find a suitable location for your air purifier. It should be in a room where you spend a lot of time, such as your bedroom or living room. The purifier should also be placed at least a few feet away from walls or furniture to ensure proper air circulation.
Next, plug in your air purifier and turn it on. If your model has a smart feature, you'll need to connect it to your home's Wi-Fi network. This usually involves downloading a specific app and following the instructions to connect your purifier to the network.
Once your air purifier is connected to the Wi-Fi network, you can control it using the app. This includes turning the purifier on and off, adjusting the fan speed, and monitoring the air quality in your home. Some models also allow you to set a schedule for the purifier to run at certain times of the day.
Finally, remember to change the filter in your air purifier regularly. The frequency of this will depend on the model and how often you use the purifier, but a good rule of thumb is to change the filter every 3-6 months.
By following these steps, you'll be able to enjoy cleaner air in your home in no time.